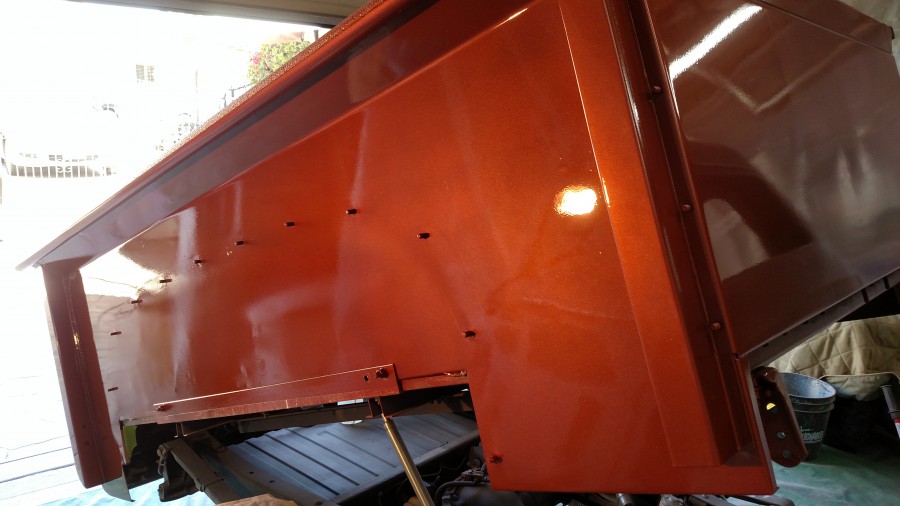
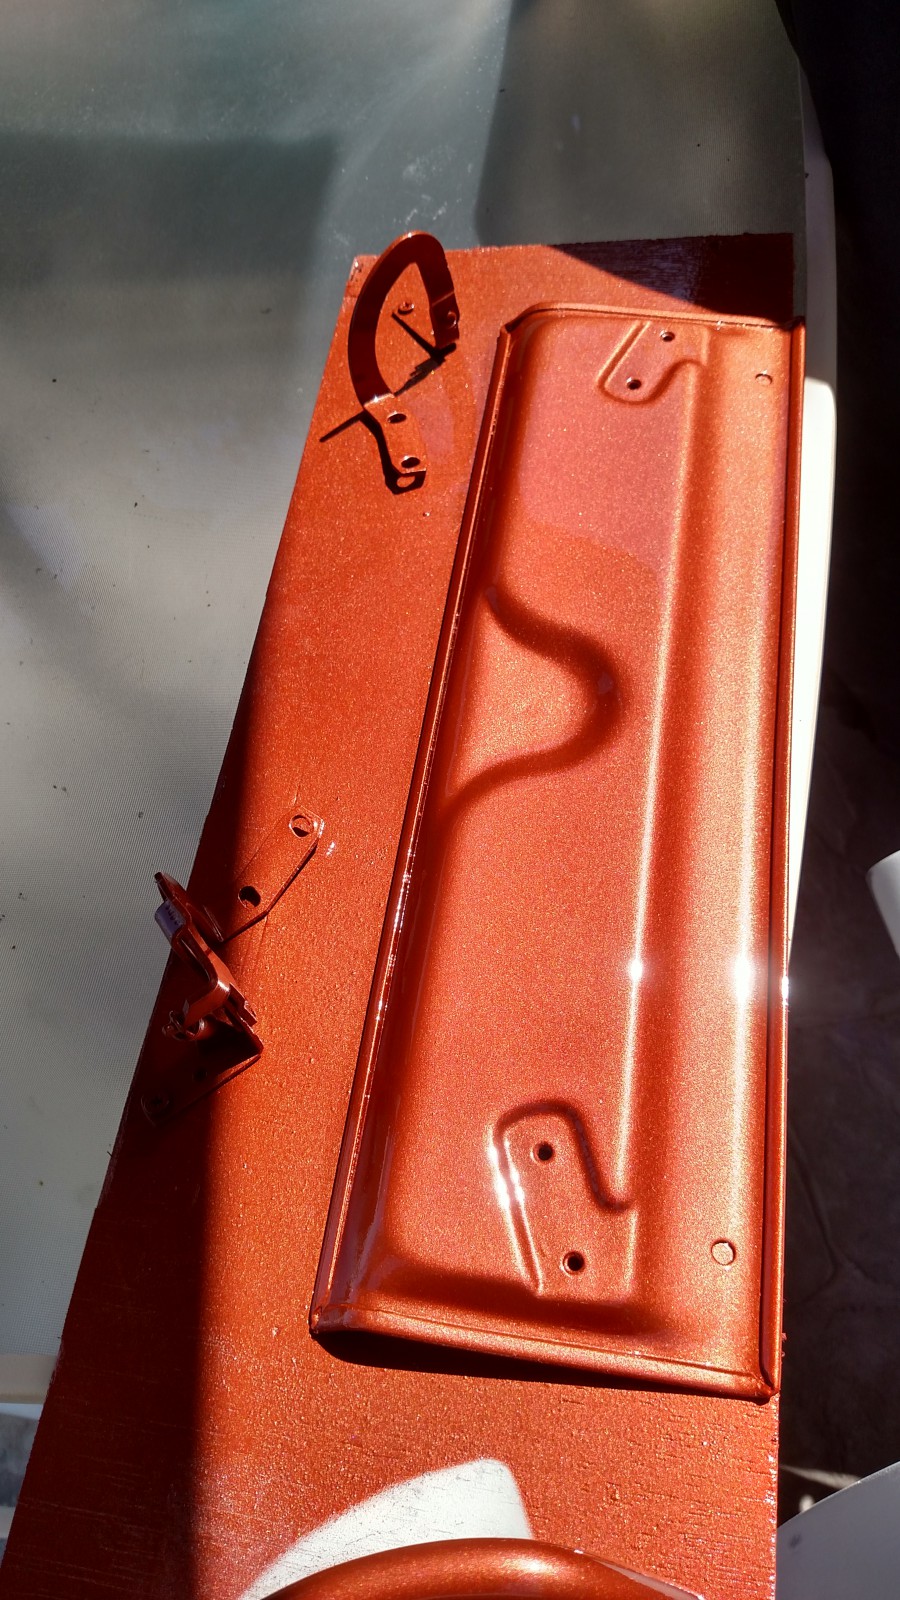
Shot the clear coat and got all the pieces done. The color change is noticed in the sun, ghost copper, adds a little pop. Not bad if I might say.
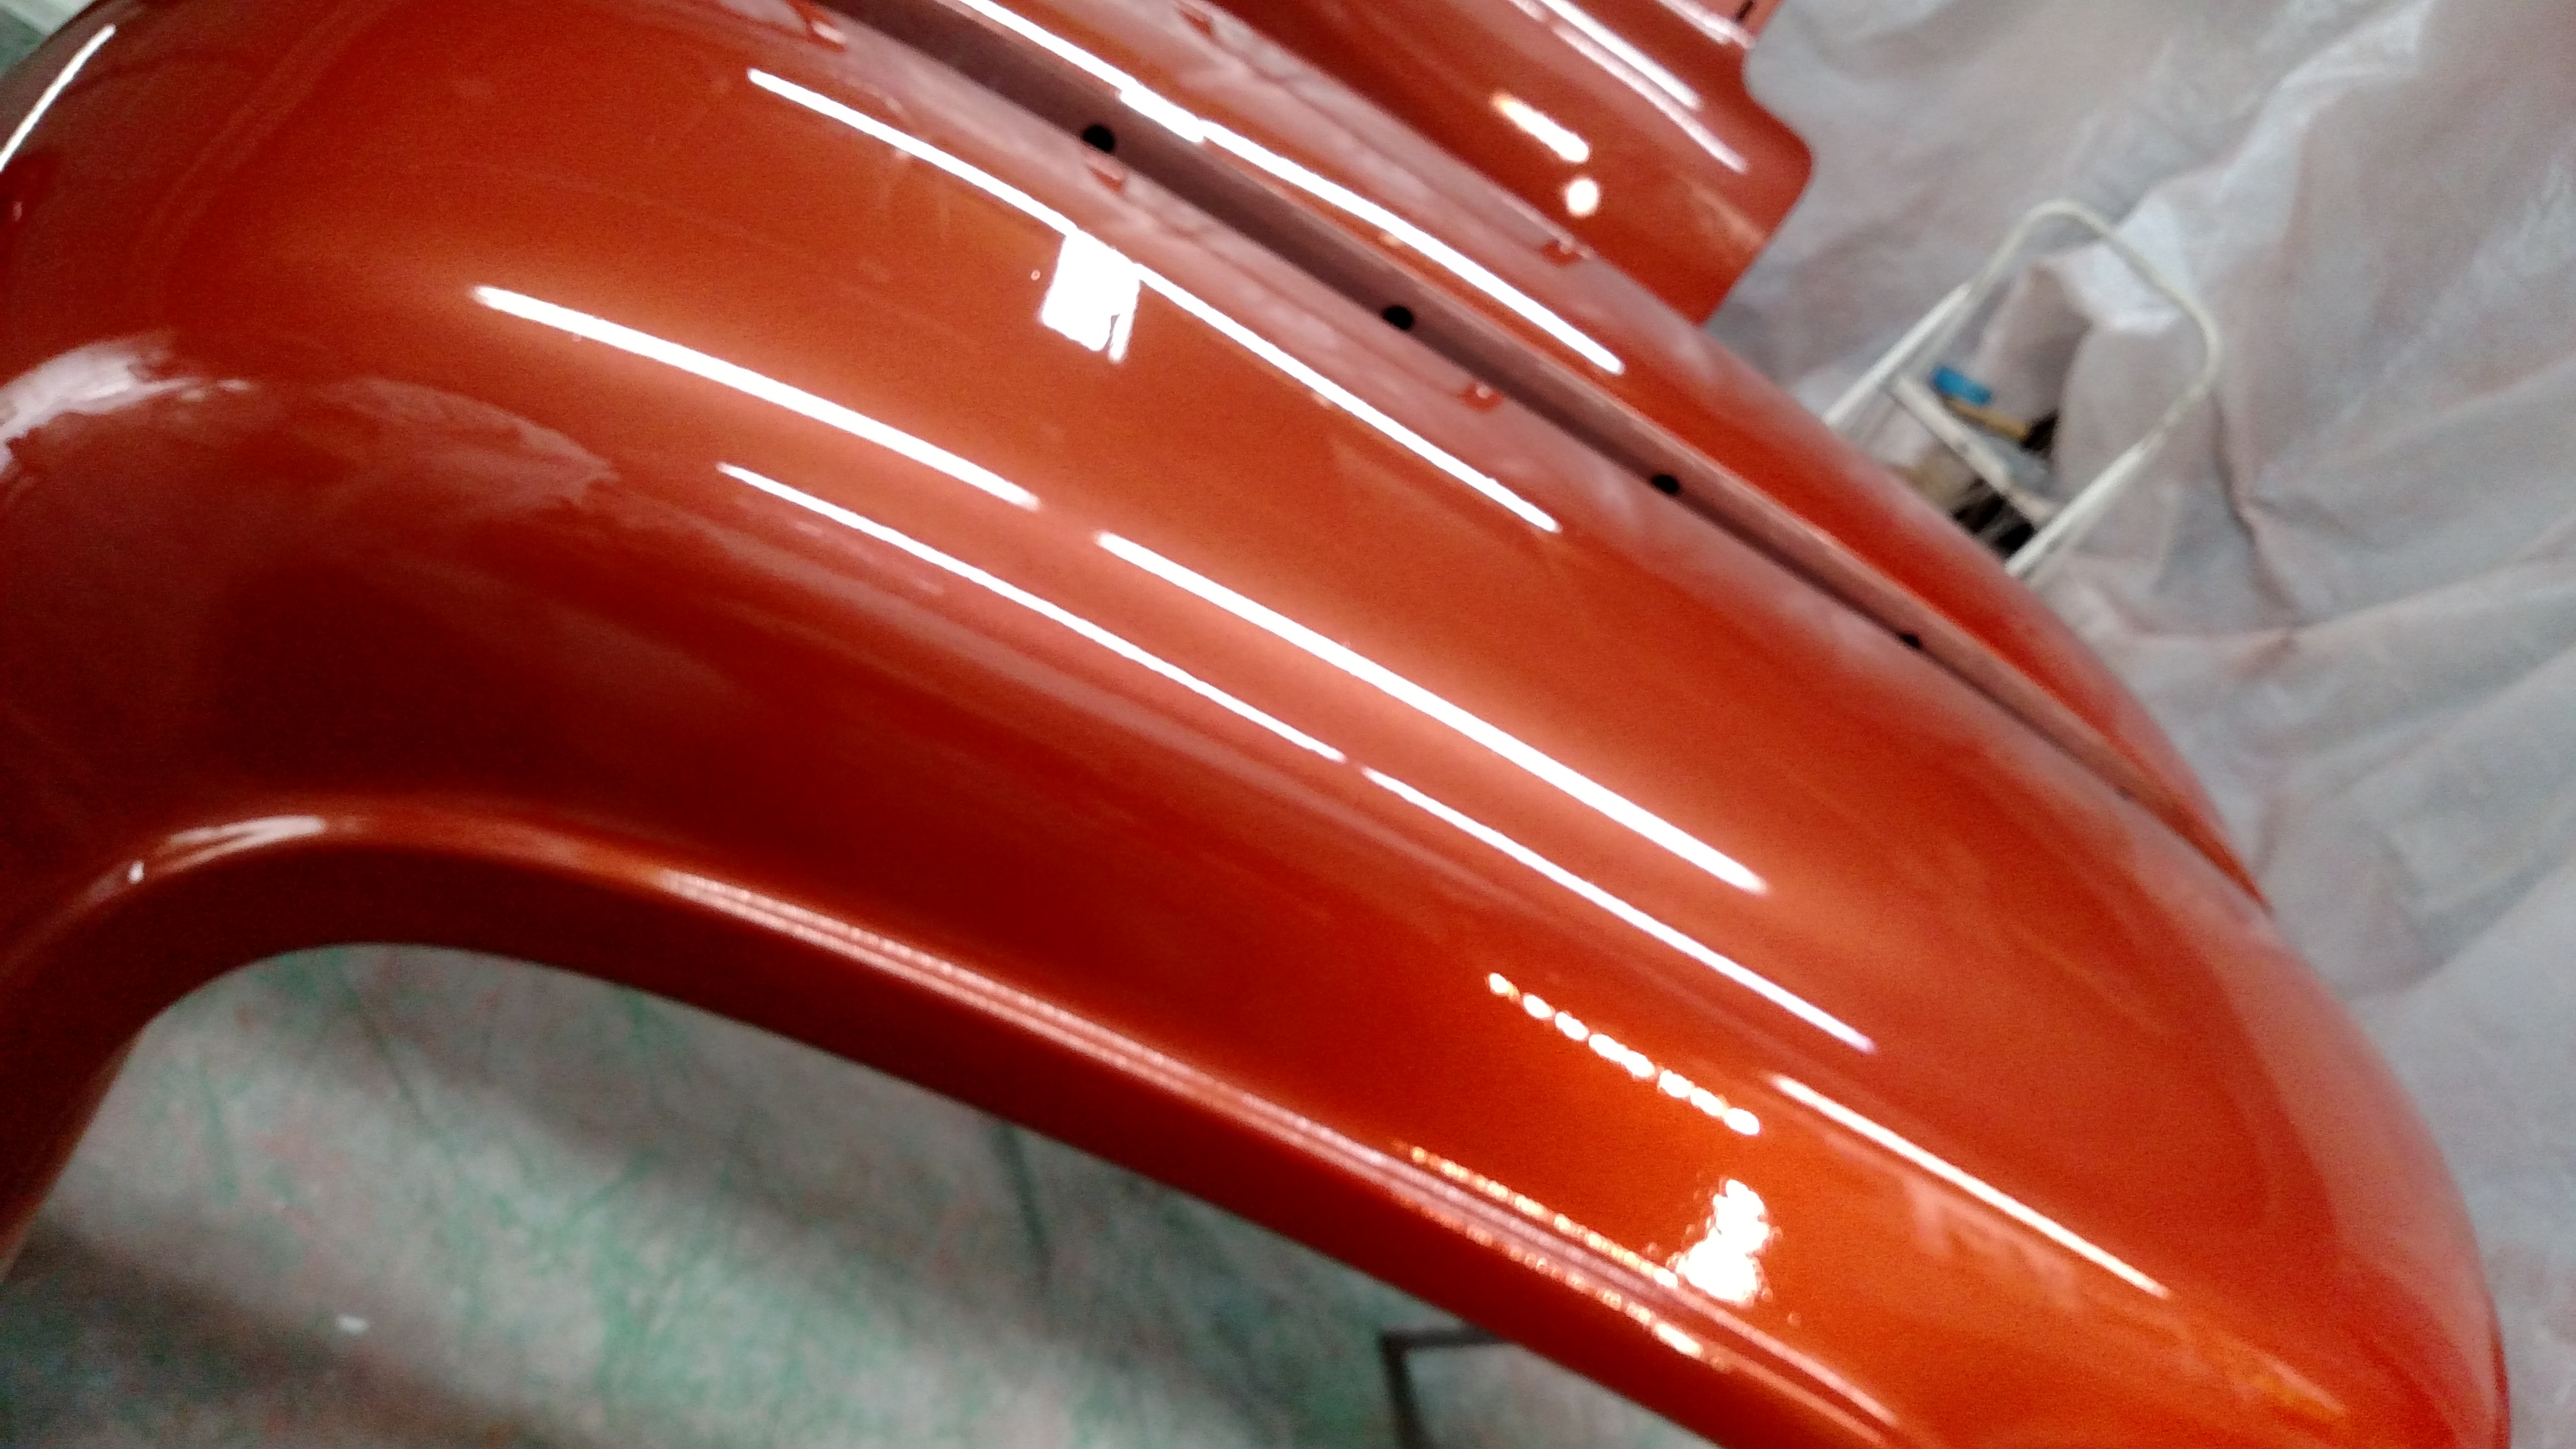
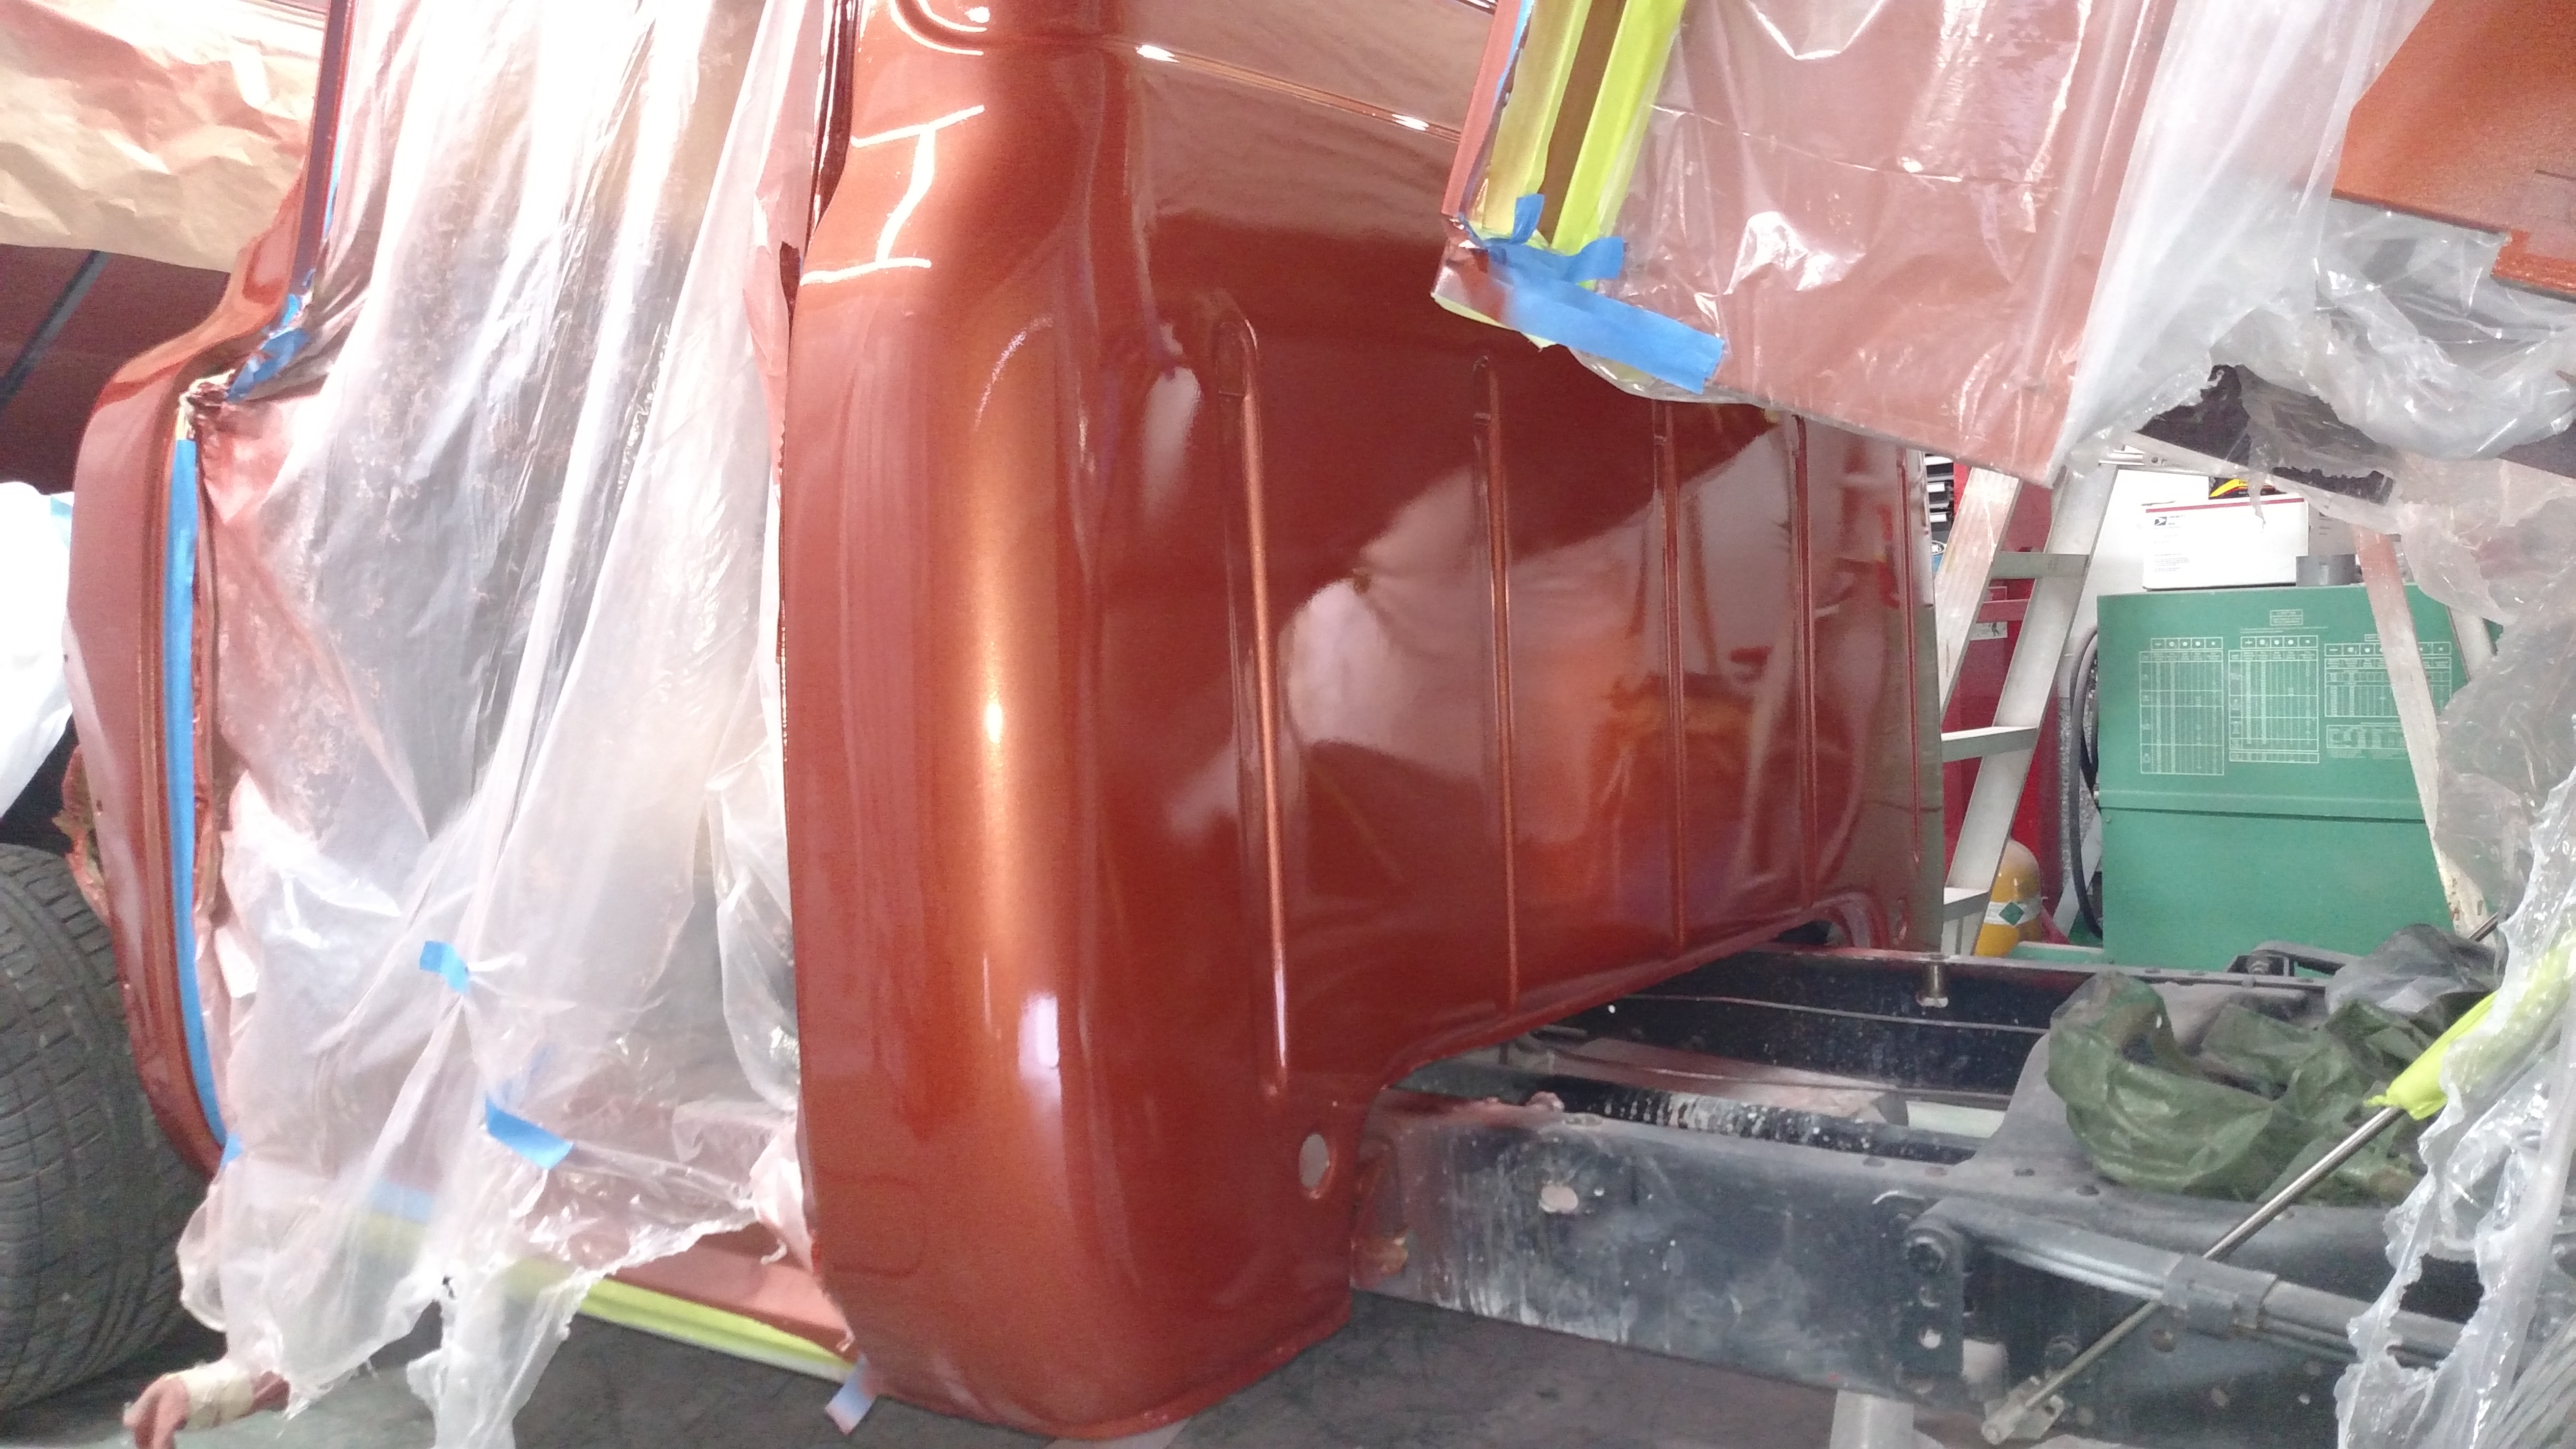
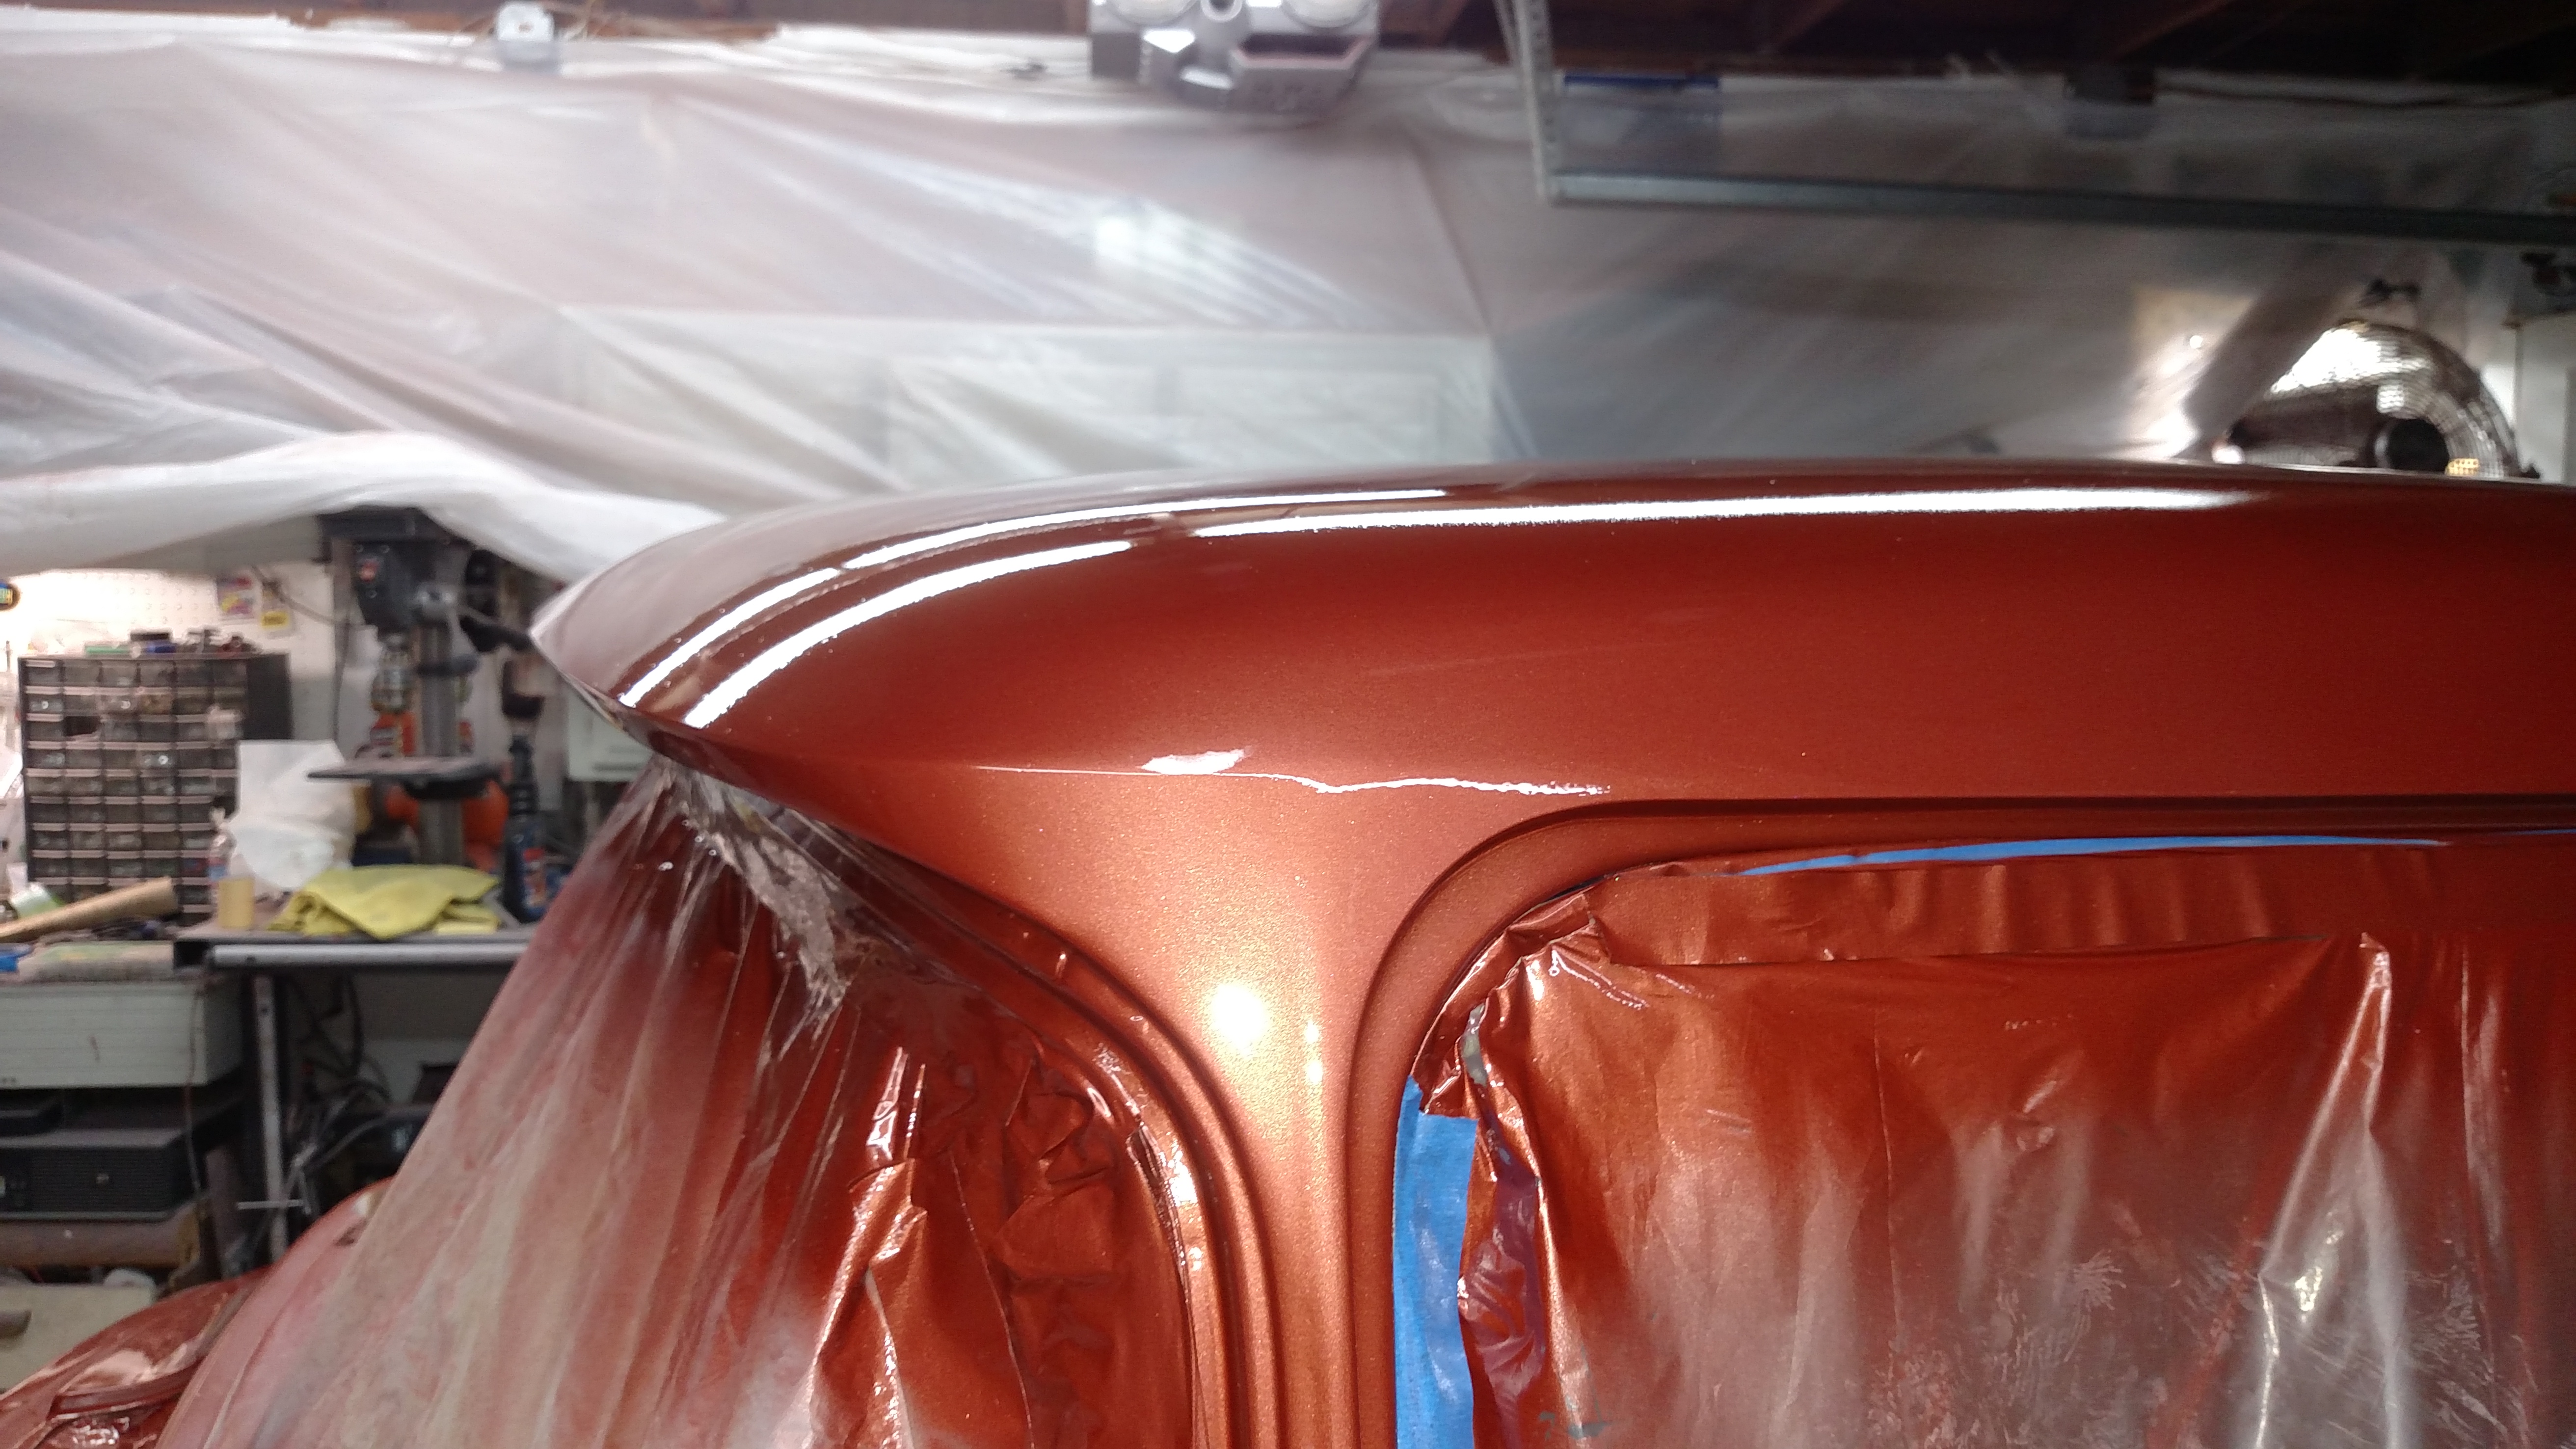
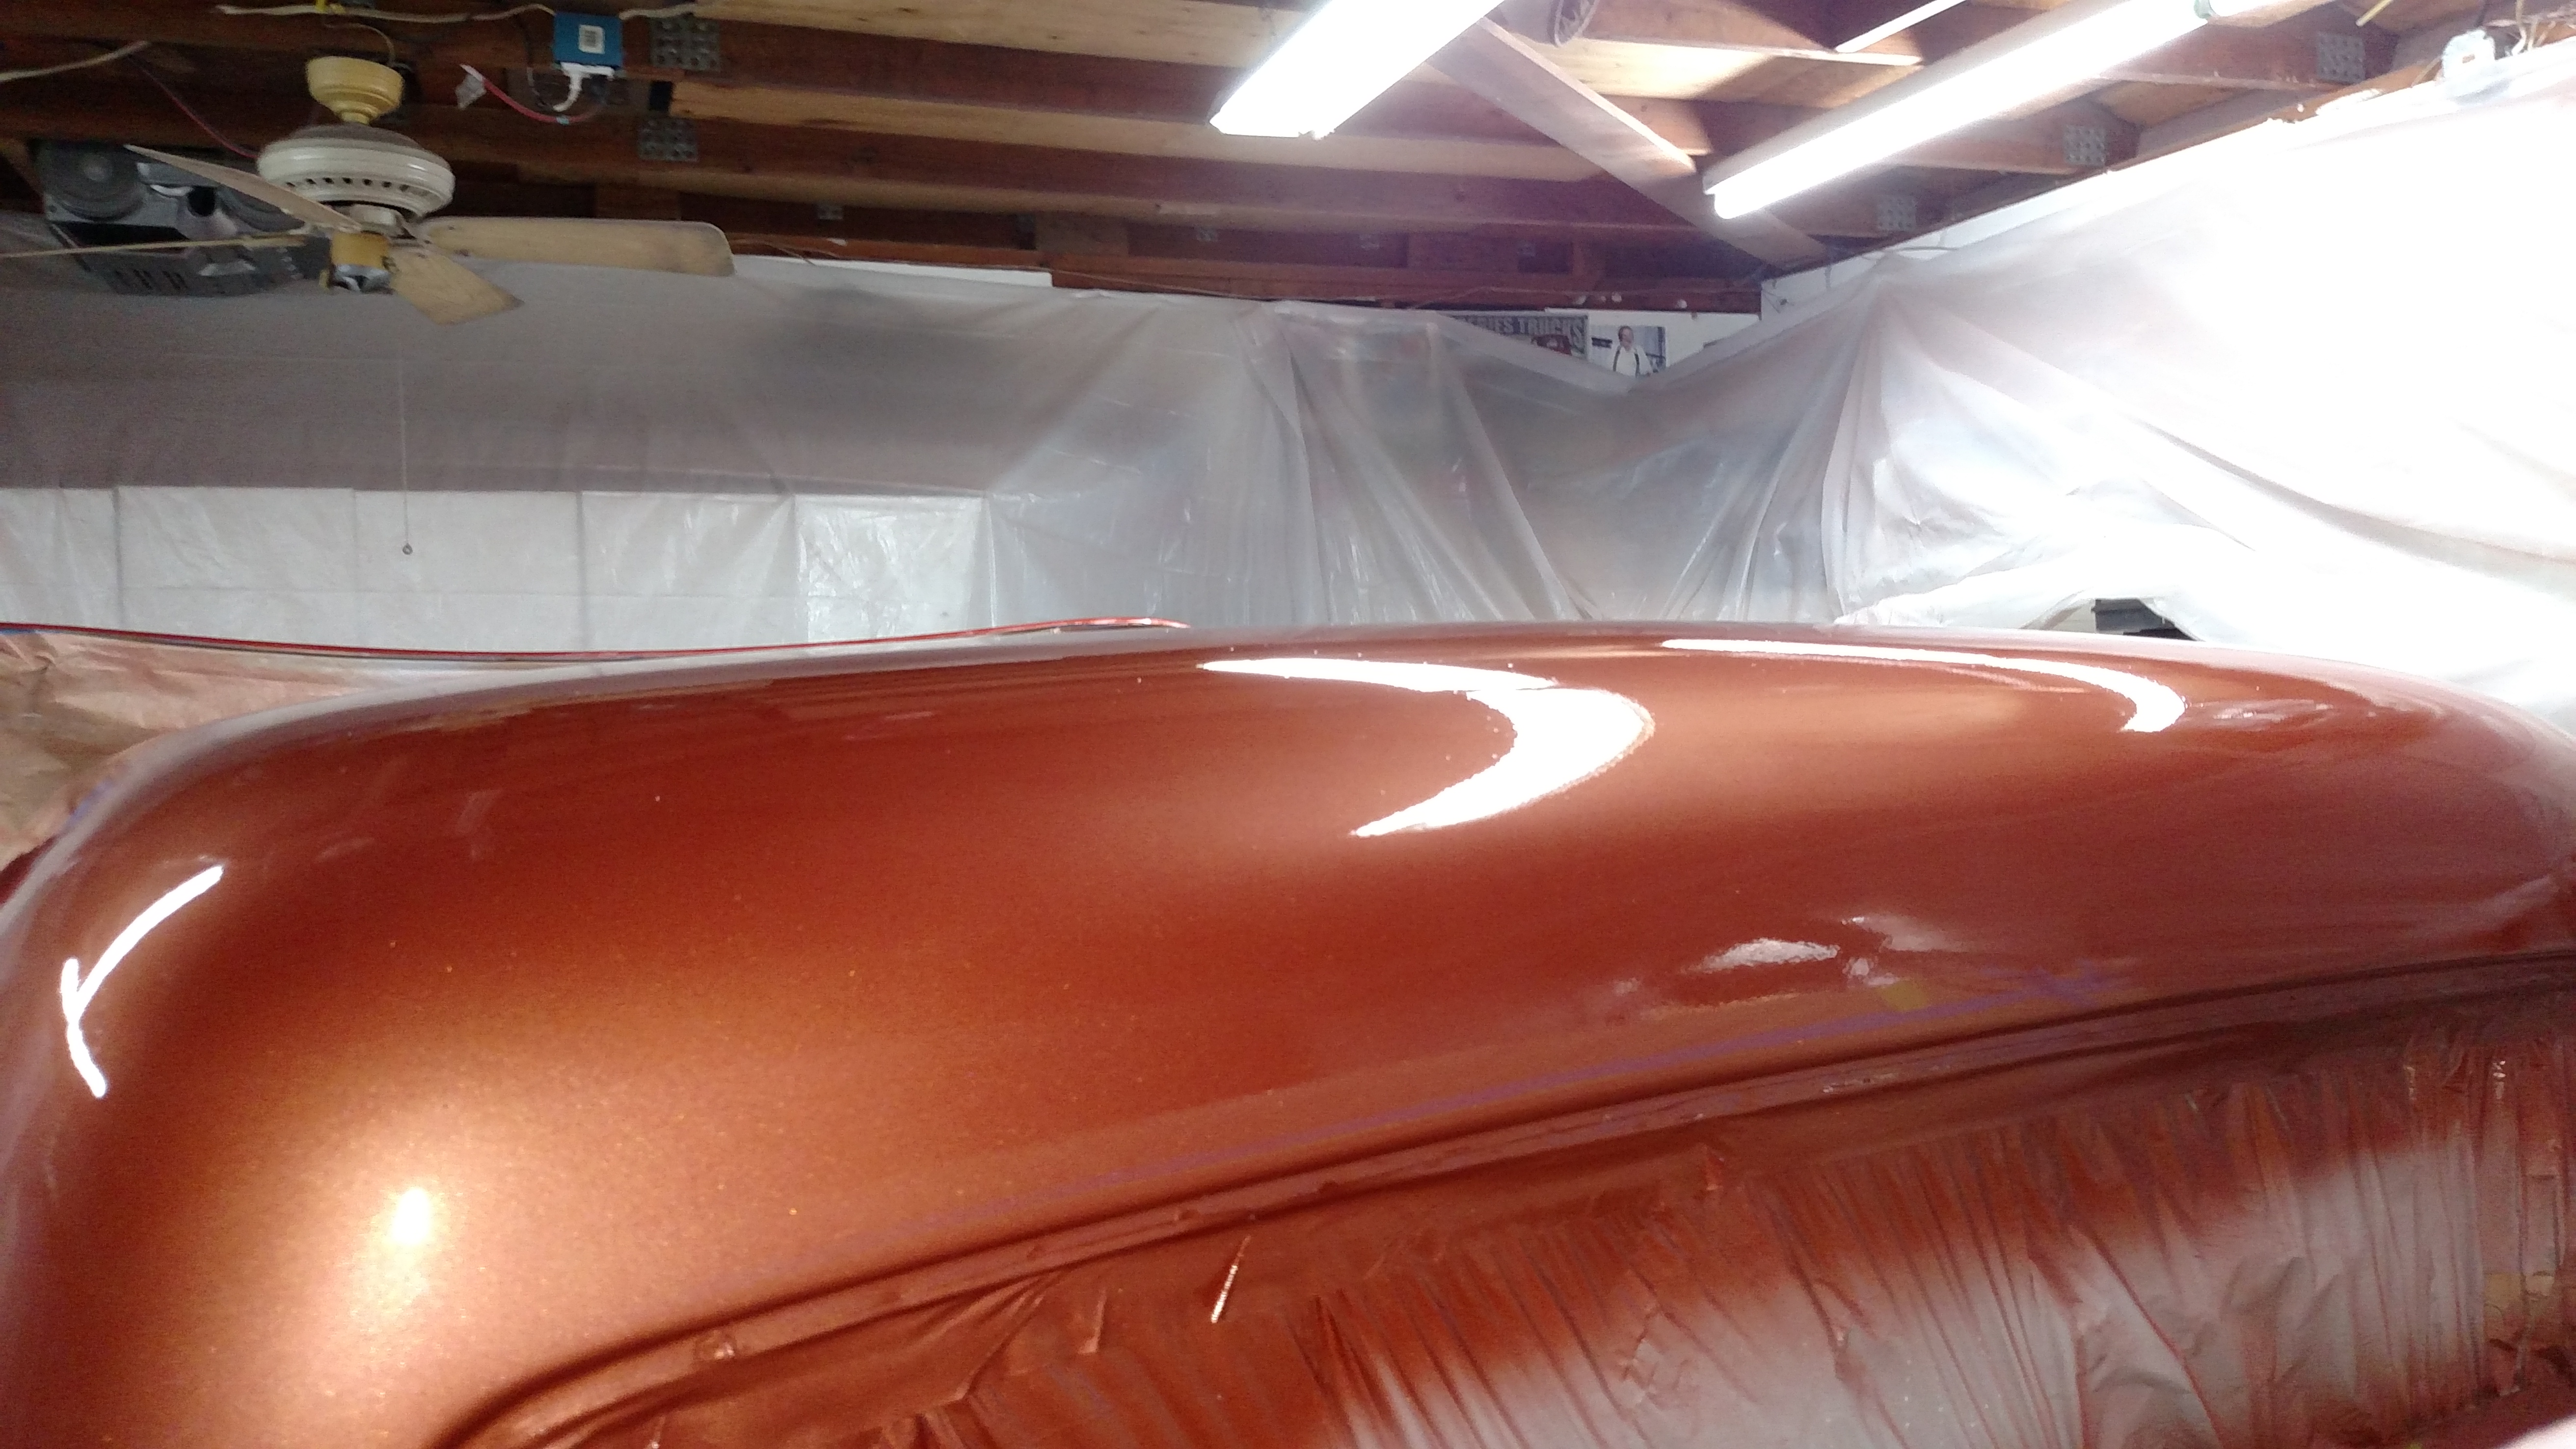


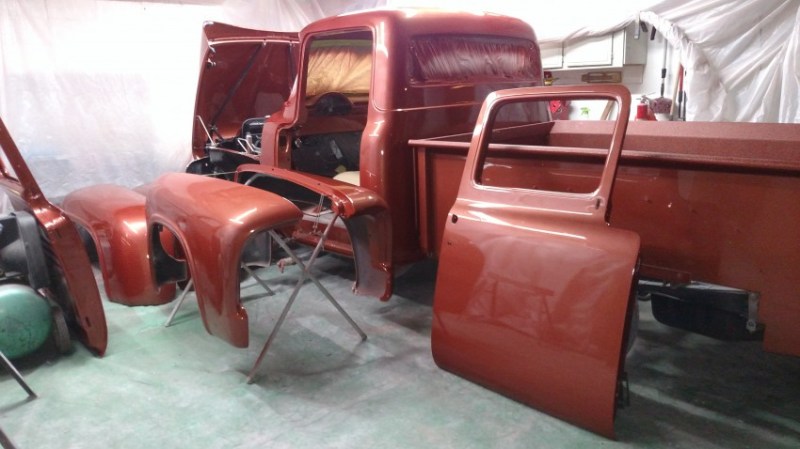
Shot the clear coat and got all the pieces done. The color change is noticed in the sun, ghost copper, adds a little pop. Not bad if I might say.


What a difference a year makes. Before and after of my dash. Moved the controls under the dash. Removed ash tray. Electrical added connectors for quick removal of cluster. Smoothed the jams as well.
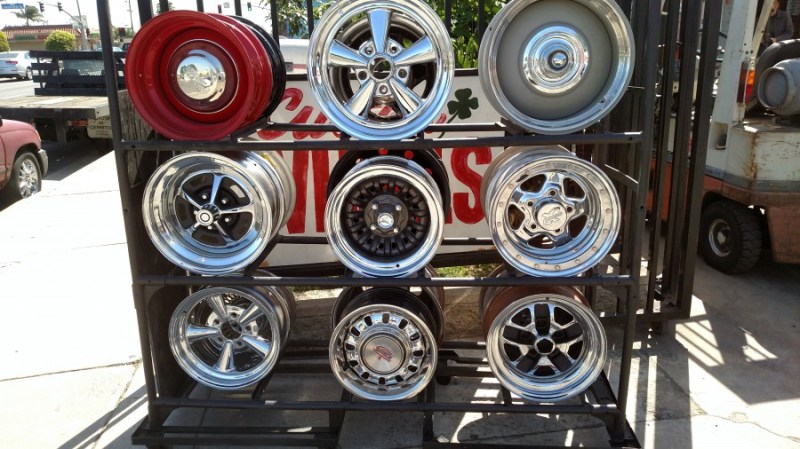
Within a couple of months I will be selecting a set of rims. Today I made a trip to Collins Custom Wheels & Wheelcovers in Bellflower Ca. They are well know for custom wheels and will set the center based on your specs, (You can also catch Tim at Long Beach or Pomona Swap meets), they can do it all for you. If you lost a hub cap you might find a match there. I seen a full selection of different style hub caps.
I took a few pics to look over. I currently have chrome 15×8 smoothies. With my wider rear fenders I’m looking to go wider and deeper. Also, looking to change things up with a different look. Below are some of the selections available.
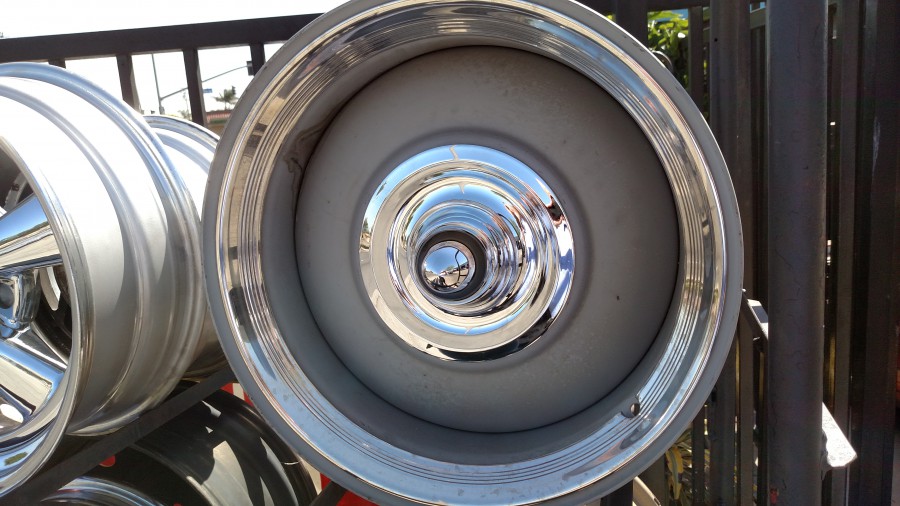
This pic is what I’d like to do. Paint the rim either black or same color as truck and have the chrome cap and ring.
Whats your thoughts and likes to these trucks?
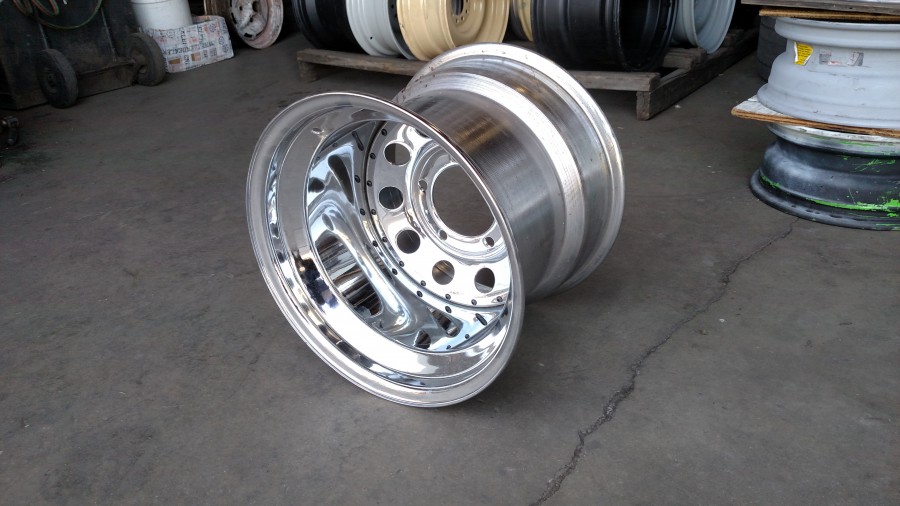
15×12
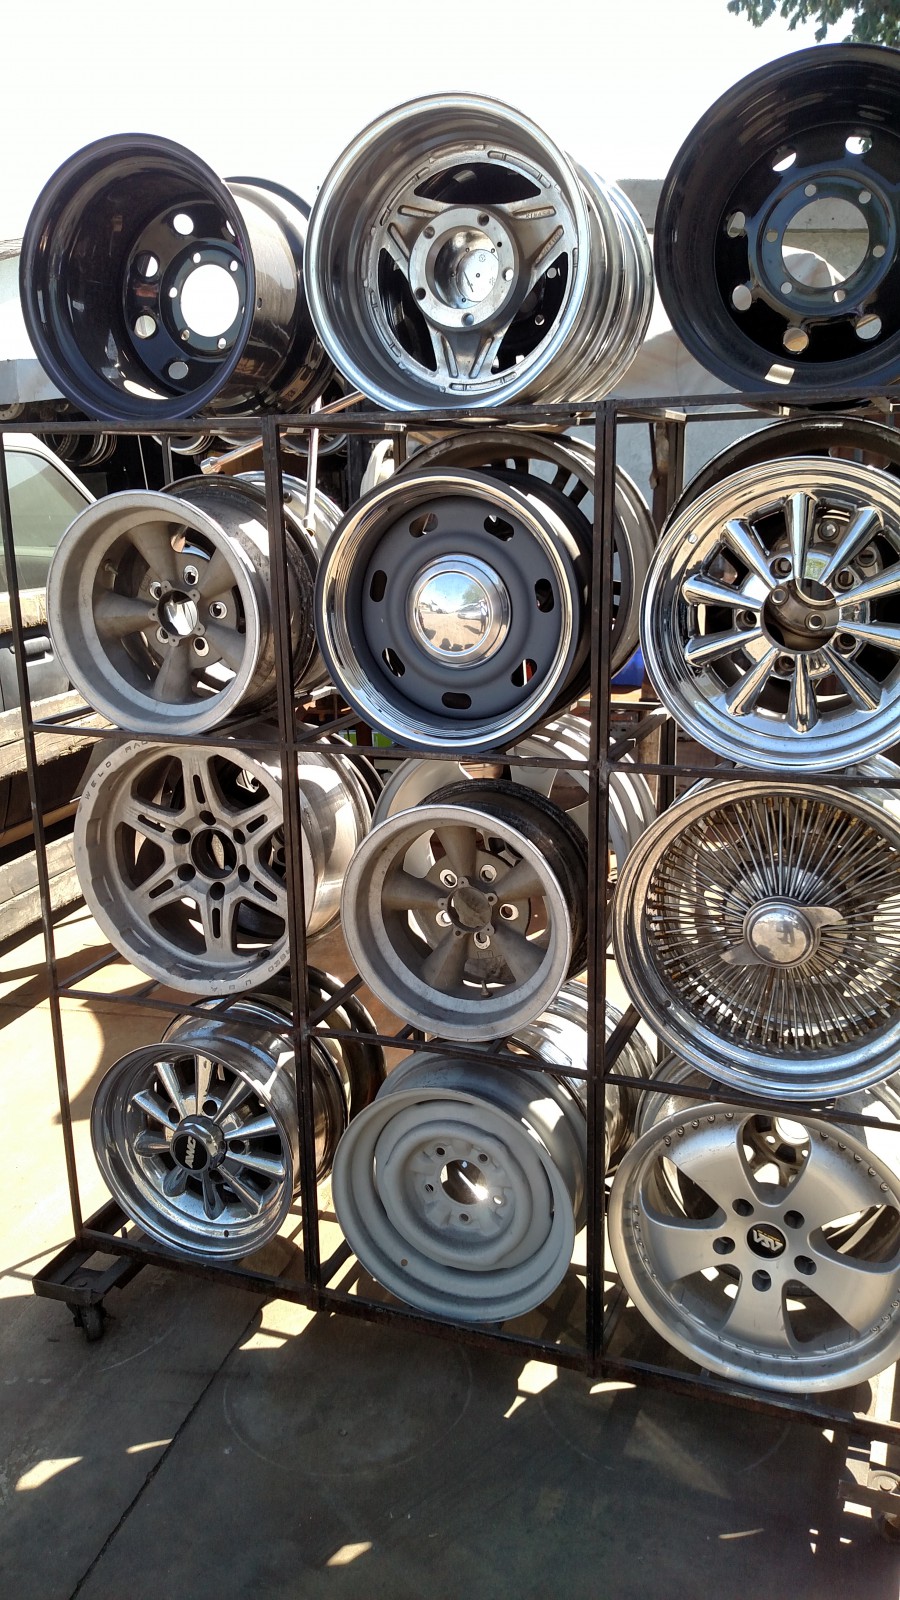
See anything you like?
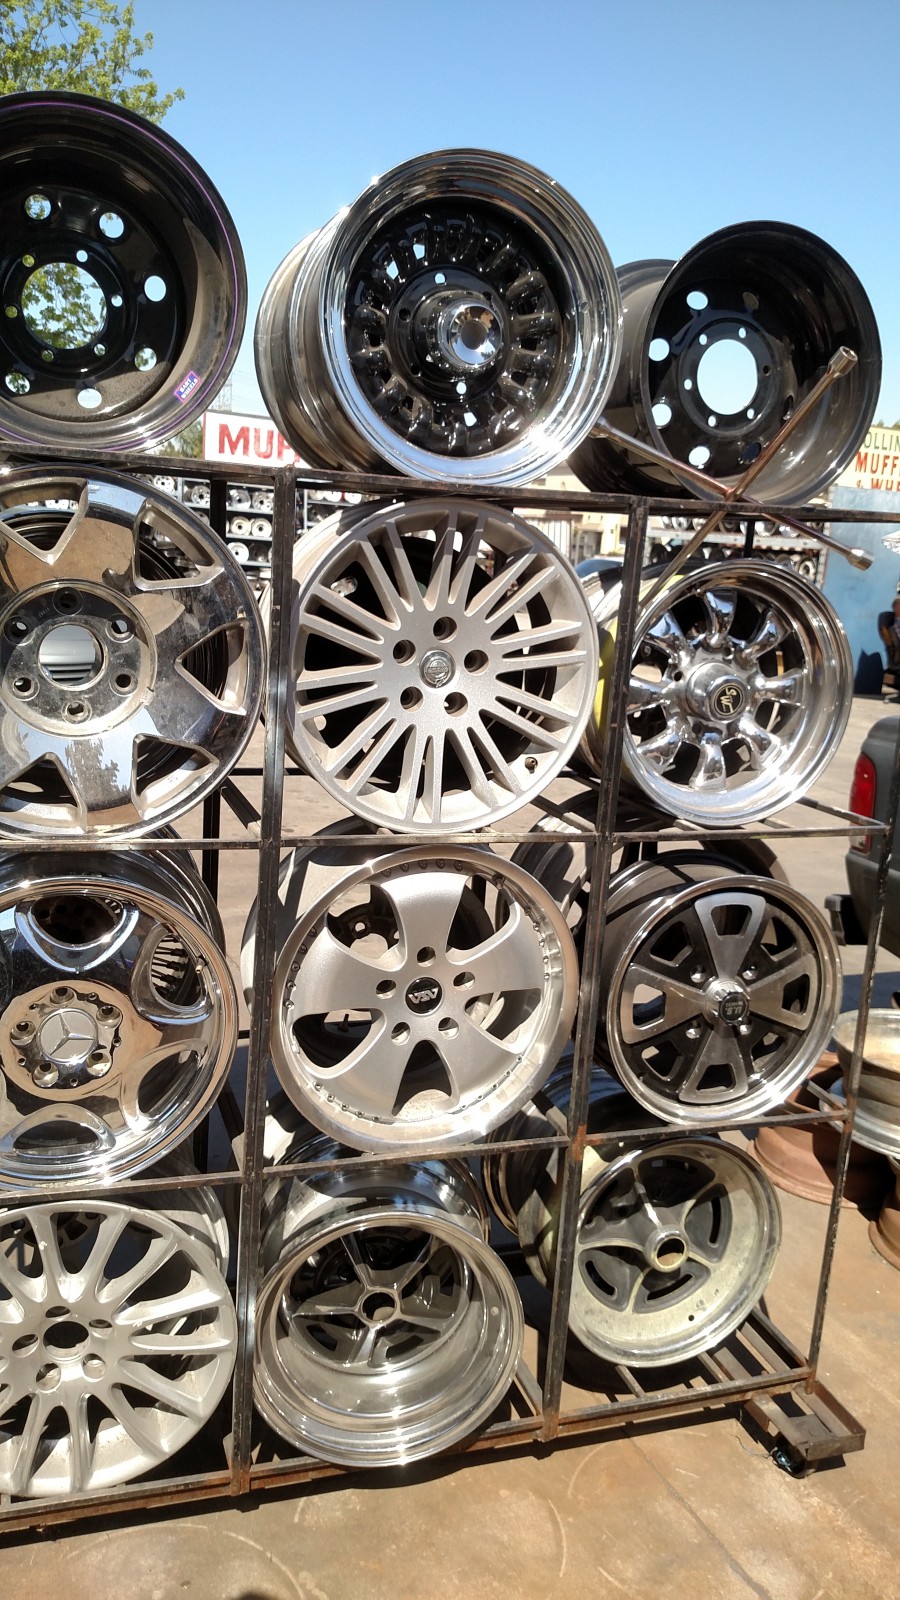
How about this selection.

I see a few on this one I like.The top left would be my second choice but all chrome and deep in bac, 15×8 front 15×12 back.

Spent some good time this weekend on my project and got the bed painted. Doing things in a garage has its limitations and it creates extra work moving things around but the project is moving along and its getting done, its nice to see some paint get on these parts I worked on for a year.
I wet sanding up to 600 grit then applying a sealer coat, before applying two wet coats of paint, before shooting clear.
Other pieces I shot today was the inside of the glove box, and gauge cluster. Next will be to wet sand the rear fenders and tail gate during the week and spray next weekend.


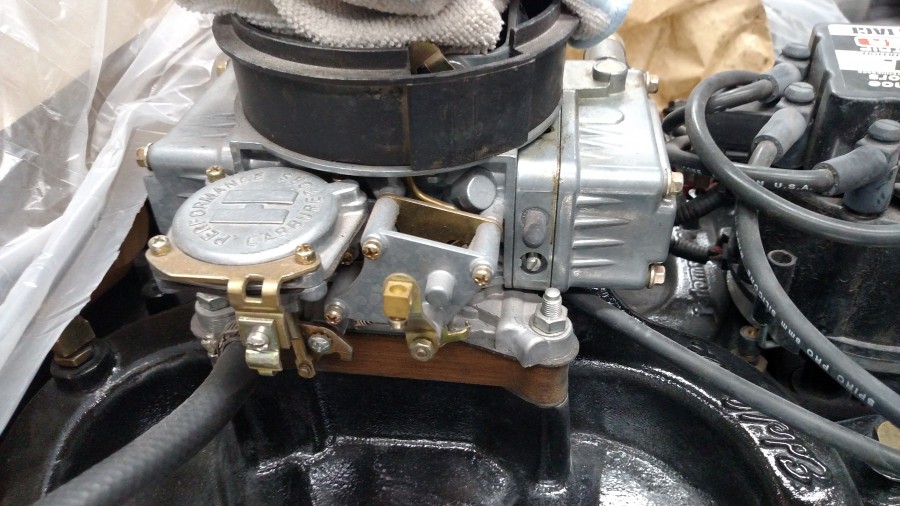
About two months ago I purchased a electric choke kit from Speedway Motors, part number 427-45223 for my 600cfm Holley.
Two years ago I got this sweet deal on a new manual choke Holley 600cfm carb for $200 so I replaced my Edelbrock 650cfm. Very noticeable difference in performance running the Holley. When I purchased the truck it had a Holley 750cfm double pumper, but it leaked and needed rebuilding so the Edelbrock 650cfm was installed in 2004.
With all the bodywork and smooth firewall I had to add the electric choke to the Holley since the manual choke cable is gone.
Overall installation took a hour.

You get all this in the kit.
Before starting to take things off.

Pretty easy instructions to follow. I have to use the old spring but install a new idle lever. It has a different angle with the adjustment screw.

Pull off the post.

After placing the new idle lever the base of the choke is mounted using the screws supplied with the kit. After, you want to make sure the throttle plate moves freely, and recheck your work.
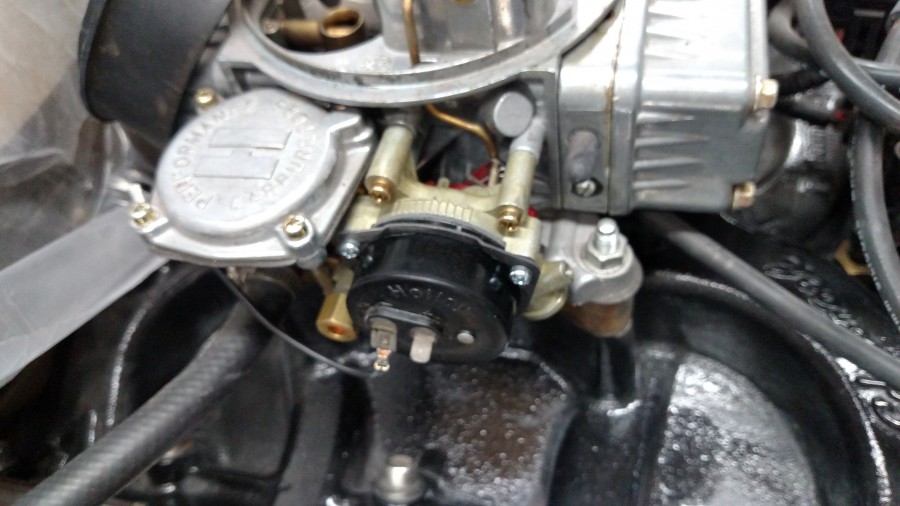
When installing the cap you have to place the coil loop into the tab on the base. Install the three screws and turn the cap and watch the throttle plate close and open. Set the cap with the notch on a line on the base. The plate should be closed position. I will need to watch for proper opening as the coil warms up and pulls the throttle plate open. Additional adjustment will be needed then.
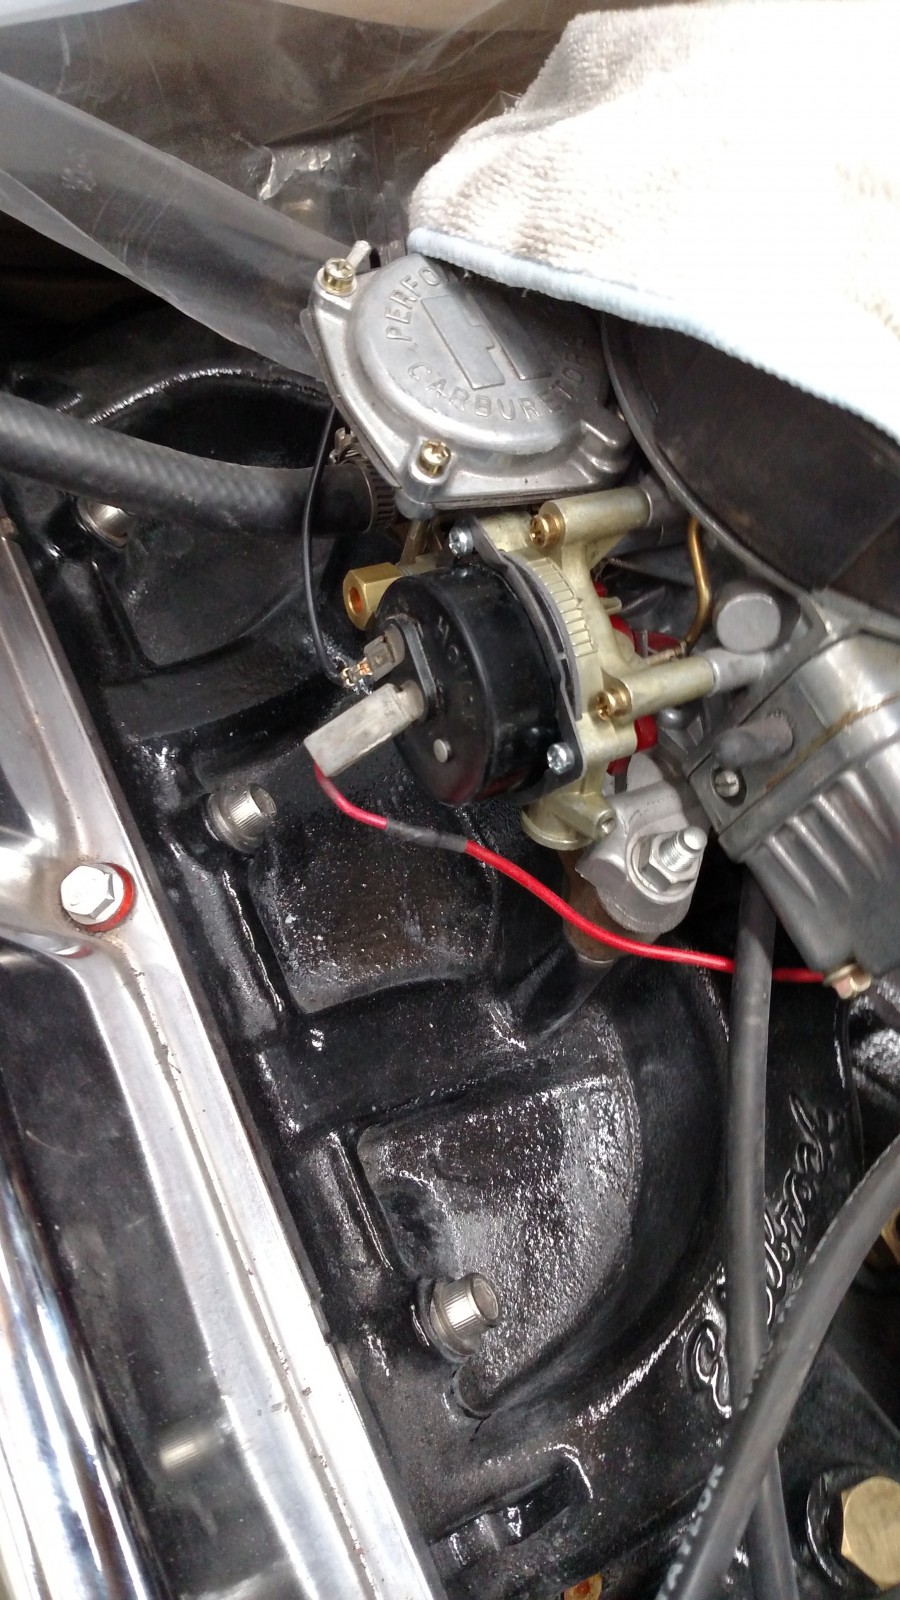
Got the ground connected and the 12v side. I had never removed the old hot when I removed the Edlebrock so I was one step ahead.
I did mine back in 2005 and it was a club event. Many came to help install the kit. There was too many chiefs but it all turned out tilting properly. You won’t hit your head on the hood anymore using the stock hinges. I saw this video on YouTube from Mid-Fifty and think it will help some of you answer some of your questions. Here is the link to Mid-Fifty kit online.

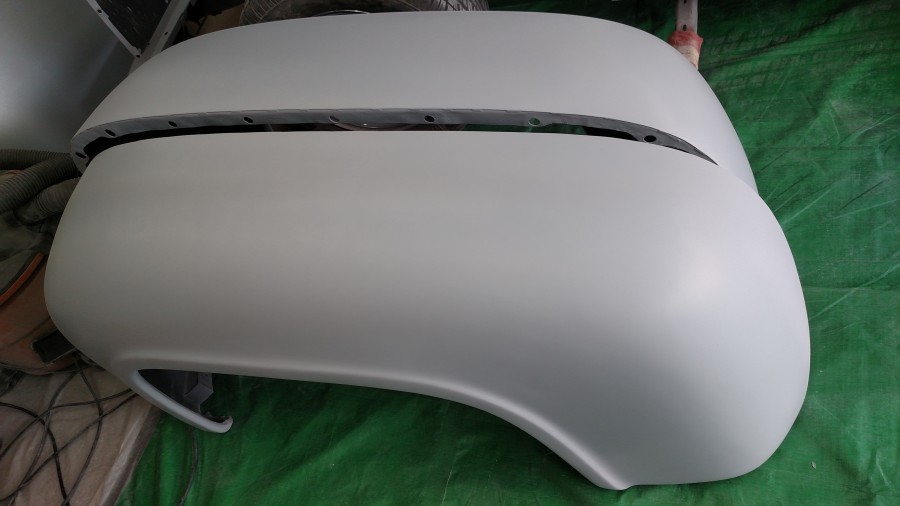
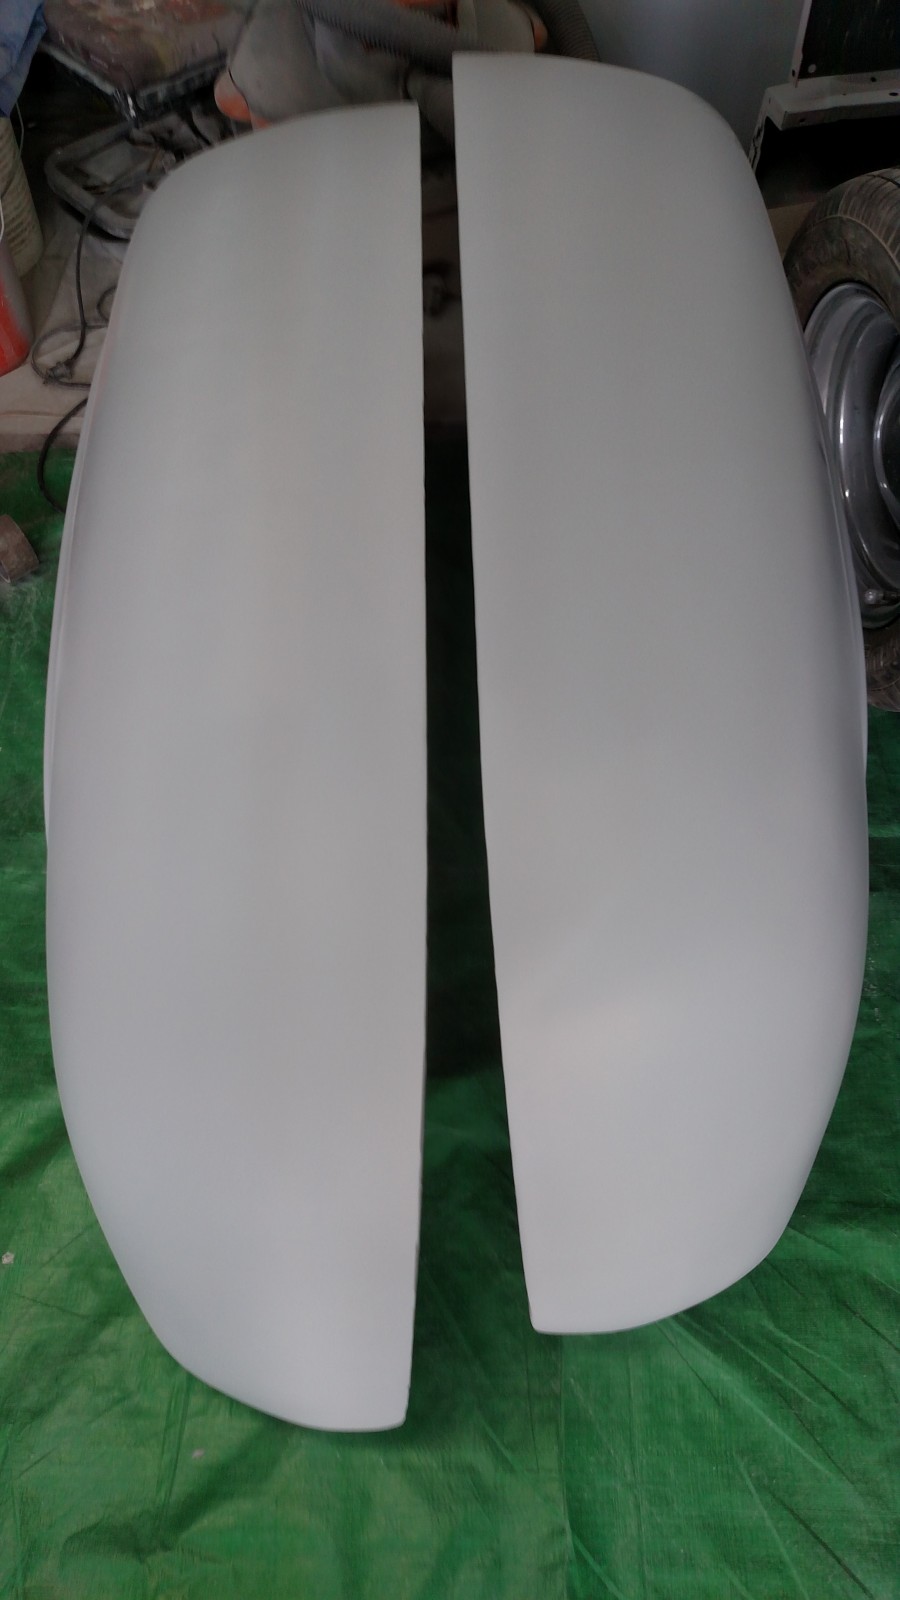
These just looks cool. I first seen this done in the 70s and just love the fat fender look from behind. A club member in the San Gabriel chapter of Pickups Limited did the widening for me, and I got to do the bodywork. He cut the flange and added 3″ of steel them stitch welded them together. I had the underside sprayed with TuffSkin bed liner (also under my running boards). Now this isn’t for the person in a hurry. It takes time to get it right. Especially on a curved fender. I will keep adding to this post since not finished yet.


You can see the end flange and about 3″ in the welding process.

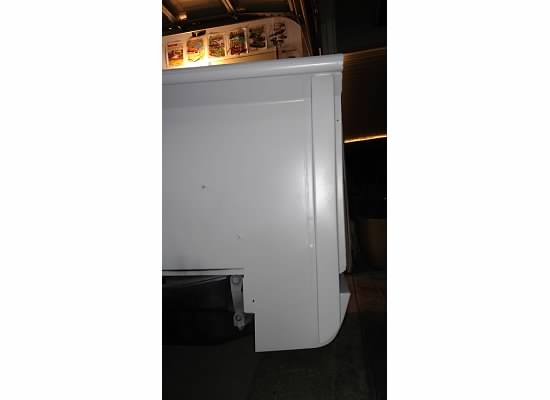
See the indent for the running boards.

Got them blocked just need to add some High build primer then sand to 600 before paint
Applied shop line JP355 primer
Now, I will look for any issues, use Evercoat glaze putty, sand and prime those areas, sand with 600 and they will be ready for paint.

I used the truck for about 2 years before I started the project. This is how it looked before I took them off and started to block them out.
To stay with the curve and lines in the rear. I decided to add curved ends to my rear bed posts. These are available to purchase but I thought I’d give it a try and make my own. Mid Fifty’s has been my source for my parts and they have these.
I grabbed some cardboard to make a template and used 16 gauge steel started cutting. I had one done in about 30 minutes and the second one even took shorter. But for the record I’d say in about a hour I were done making them.
I tack welded from the inside and as I moved a long the curve I would tack weld. I butt welded to the bed post once I got those to bare metal. Added some fiberglass filler and worked the areas until I had them nice and smooth . I applied some 2k epoxy primer, next step block/sand then shoot Hi-Build primer sand with 600 wet before paint.
![IMG_20150101_203131048[1]](https://stevestillwell.files.wordpress.com/2015/02/img_20150101_2031310481-e1423090935342.jpg)
Used 16 gauge steel. Use some thin cardboard and made a template so each sides would be the same on the curve. The template matched the curve on the roll pan since there are going to match that.
![IMG_20150101_203148960[1]](https://stevestillwell.files.wordpress.com/2015/02/img_20150101_2031489601-e1423090923742.jpg)
Tack from the inside and pushed down tacking along the way.
![IMG_20150101_202934921[1]](https://stevestillwell.files.wordpress.com/2015/02/img_20150101_2029349211-e1423090905892.jpg)
Checked the fit butt against the bed post. Need to take those down to metal before butt welding to post.

A look after the welding and some bodywork. Also took out the bed seams.

Side shot after some 2k applied. Its what makes our trucks all diffferent.

Nice and they match!
Its great to work at night when the weather is nice. Throw on some jams and start blocking.
Tonight I continued the process on the rear fenders and doors. Its been about a month since I had some quality time on my 56. The weather today in So Cal was 85! Tonight is just right.
I used some 3M dry guide coat to check for low spots. Used 80 grit with a long Dura-block. Not much pressure just let it flow. Crossing one way then the other. I like three times. If needed applied some Evercoat Metal Glaze Ultra. That stuff works great!
Next sand up to 180 then shoot more high build primer. Block one last time before sanding up to 600 and paint.
Here are a few pics.


Spent a little more time the following night, with a little help from a friend. Working the door jams.

Here are some of the pics from the start. Like I said, I started this project with after widening my rear fenders 3 inches. I ran with them painted primer for two years before I figured I’d have the time to finish and paint them. The next things I knew the glass was coming out and the bed was off the truck. And that’s where things got interesting..(Read More)
